Design Challenge: White,Gold and Silver Christmas Box

IMG_5337


IMG_5338


Hello,

This is Jackeline, for this month Elizabeth Craft Design Challenge I designed a gift box using  Els Van Burgt Studio Collection dies.

Let’s get Started:

  1. Cut a rectangle piece of  14 1/4 x 4 3/4. Make 2 vertical score lines dividing the rectangle in 3 pieces.
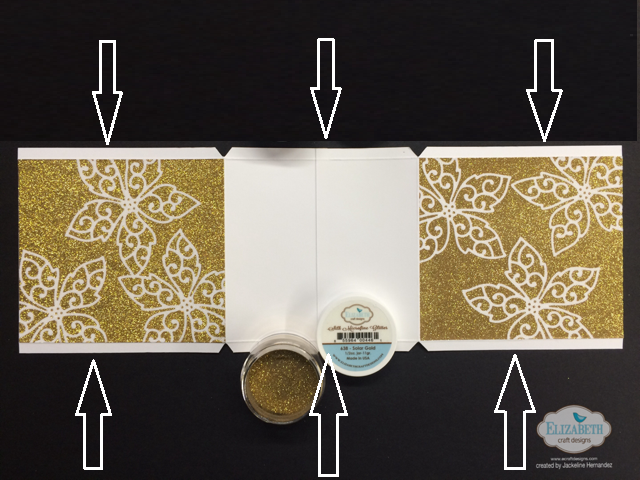
  2. Make 2 horizontal score lines leaving 1/4 of inch in each end on the rectangle. (See picture below)
  3. Cut 2 rectangle pieces of 7 x 41/4, and using Tag & More 9-Sparkle die cut the top parts of the rectangle pieces
  4. Cut 2 pieces double side adhesive tape of 5 x 41/4.
  5. Cut some Poinsettia flowers with the protector paper of the tape (backing)
  6. IMG_5343Place the double side adhesive on the ends of the rectangle (see picture).
  7. Remove the backing paper and place the poinsettias on top of the sticky part. Cover with the backing paper previously remove and rub to make sure the poinsettias are in place.
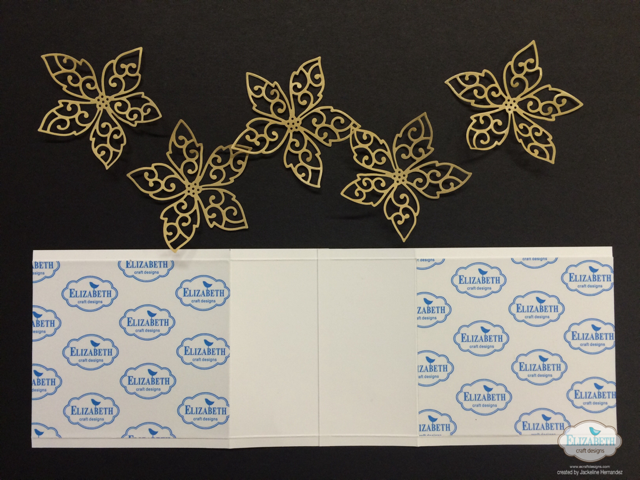
  8. IMG_5342Remove the backing paper and apply  gold silk Microfine glitter, brush the excess and polish it.
  9. Remove the poinsettias and apply the white silk Microfine glitter, brush the excess and polish it.
  10. With the assistance of the Fine Pointed Scissors from Elizabeth Craft Designs make 4  “V” cuts on the score lines.(See Picture)      IMG_5341
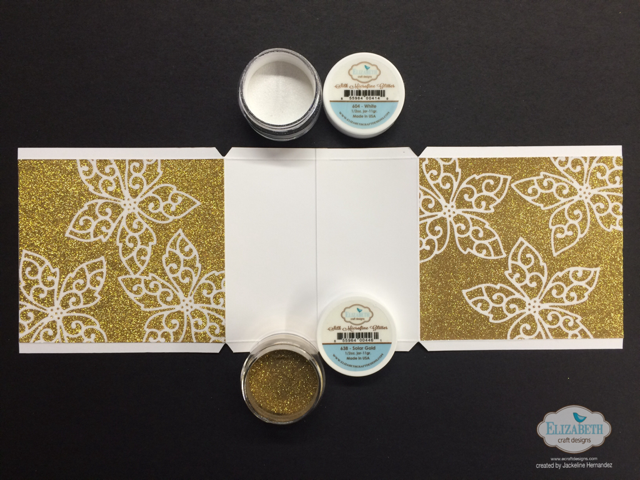
  11. Place double side adhesive tape on Gold and Silver Shimmer Sheetz. Die cut some pieces using the ribbon and Jewels die to built the tree.
  12. Die cut the star on gold shimmer Sheetz using the decorative piece from the Christmas Tree Pop Stand.
  13. Cut a small rectangle piece in gold Shimmer Sheetz for the trunk of the tree.
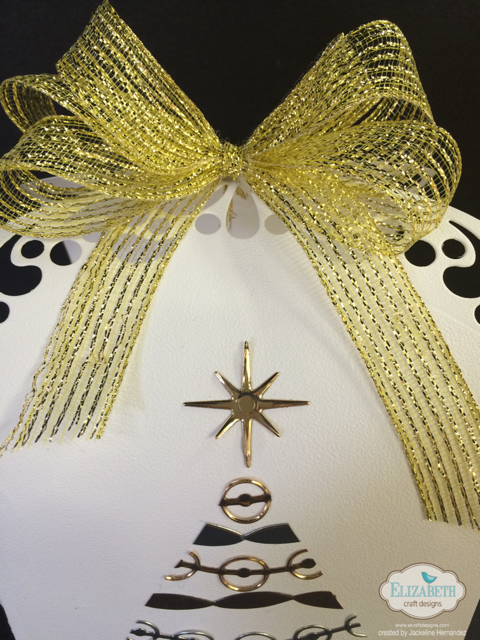
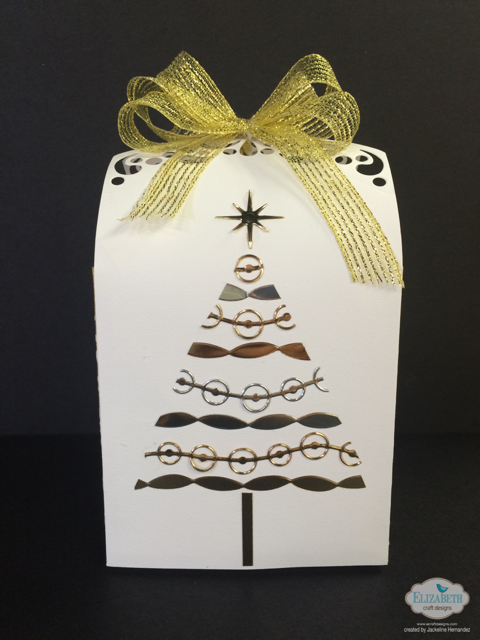
  14. Built the tree in one of the tags using the ribbon pieces. Start placing the star , next place the bottom ribbon. (Draw two lines that can help you as the template to built the rest of the tree) IMG_5338
  15. When the decoration of the box is finished, it is time to assemble it.
  16. Add some double side adhesive in the flaps, and attach the tags to built the front and back of the box.IMG_5341
  17. To close the box, use some gold ribbon and create a bow on the top of the box.IMG_5339


I hope you enjoyed this tutorial

Happy Crafting!!!

Jackeline.


SUPPLIES LIST:

Elizabeth Craft Designs

1077-Tags & More 9 – Sparkle

1067-Poinsettia

1070 – Ribbons & Jewels

1037 – Christmas Trees Pop Stand

PSF102 – Soft Finish Cardstock 8.5″ X 11″ 270gr

SS0212 -Gold Metallic – 3 Pack

SS0211- Silver Metallic – 3 Pack

604 – White – Silk Microfine Glitter

638 – Solar Gold – Silk Microfine Glitter

502 – Clear Double Sided Adhesive Sheet – 8.5″ x 11″

505 – Clear Double Sided Adhesive Tape – 3mm

801 – Fine Pointed Tweezers by Elizabeth Craft Designs

802 – Fine Pointed Scissors by Elizabeth Craft Designs

OTHERS:

Gold Ribbon


ECD DESIGNERS’ CHALLENGE

IMG_4683

It’s Jackeline Rojas here. Today I am bringing you a project using some of the new Elizabeth Craft Designs dies .

Let’s Start:

1.  Cut a piece of brown cardstock  that measures approx 8 1/2 inches x 8 inches . Score at 4 1/4″ and fold in half to create your card base.

2.-Cut a piece of green paper that measures approx 4 1/4 inches x 8 inches.

3. Line up the main tag die from the Tags & More 9 – Sparkle in both sides of the cardstock, and paper and die cut.

4.- Line up the decorative tag die from Tag & More 9 Sparkle in both sides of the green paper,and die cut.

5.- Using double side of adhesive adhere the decorated green piece to card front.

6.- Using Leafy Branch Die cut 6 branches in green and cream cardstock.

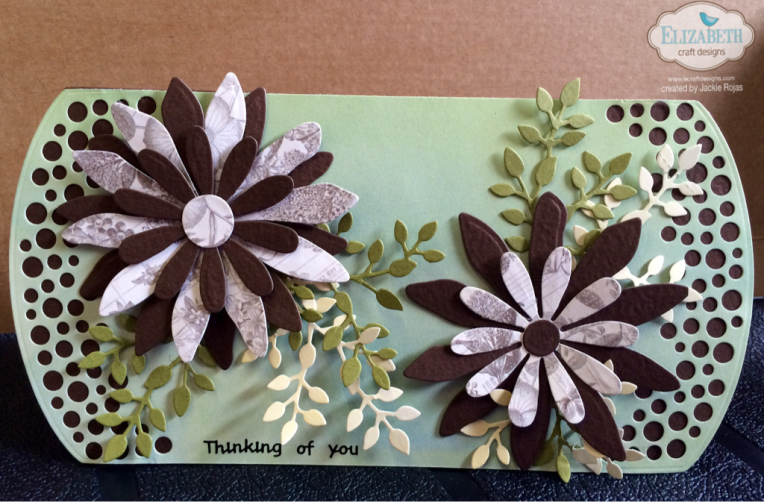
7,- Using Big Flower Set 1 die cut two flowers in a combination of decorative paper and brown cardstock as show in the picture.

8.- Use the die cut pieces to build the flowers and decorate with the branches as its show in the picture.

9.- For the sentiment use peel off sticker Assorted words in black.

I hope you enjoy this tutorial.

Have a wonderful day!

Jackeline

Elizabeth Craft Designs

1077 Tags & More 9 Sparkle
1033 Leafy Branch
795 Big Flower set 1
343 Black Assorted Words
505 Transparent Double Sided Tape – 3mm

Others

Cream, Brown, Green Cardstock.
Brown and Green decorative paper.

ECD DESIGNERS’ CHALLENGE: SCRAPBOOK PAGE

Hello Everyone

It is time for our August Elizabeth Craft Designer Challenge . This month challenge is built a Scrapbook Page using the wonderful Elizabeth Craft Designs Products

I was inspired by the wonderful pictures my brother share of his first family vacation to Florida.

IMG_4681

Lets Started;
1.- Choose a background paper.I found one with a pattern that represents waves.
2.- Print a couple photos. Trim them to fit behind the frames.
3.- Die-cut the frames out of white cardstock and double side adhesive.
4.- Using the Beach edges set die cut 3 pieces in green cardstock using the one with the palms, and 2 pieces in light yellow cardstock using the one we use for the sand.
5.-  To built the surf boards; cut your color stripe of carstock, tape it to the white cardstock and die cut using Tag and More 6- Daisy
6.-Die-cut the title from black Velvet Adhesive with the Alphabet 1 Upper Case die.
7.- Embellish with some shells.
I hope you enjoyed this tutorial.

Jackeline

Supplies:

Elizabeth Craft Designs –
1062 Fitted Frames 2 Curvy Squares – Coming soon
1063 Fitted Frames 3 Lace Squares – Coming soon
959 Tags & More 6 – Daisy
967 Alphabet 1 – Caps
981 Beach Edges
502 Double Sided Tape Sheet – 8.5″ x 11″ – 5 pack
411 Velvet Adhesive Sampler Pack

Other –

Cardstock :White, Yellow, Red, Green
Patterned Cardstock
Shells

Have a Mice Day !!!

Hello everyone, This month ECD Designer’s Challenge is inspired in the three wonderful background dies : The Pebbles, The Bricks and The Circles, It was a little difficult to pick my favorite so I decided to use them all.

Here is my Project: photo (3) 1. Using the tag shape die from Tags & More 7 – Vine die cut:

  • Two 4 1/4” x 8” tags from patterned paper.(Adhere Transparent Double Sided Adhesive Tape to the back before die cutting)
  • Two 4 1/4” x 8” tags from white cardstock.
  • One 4 1/4” x 8” tag from brown cardstock.
  • One from transparent vinyl.

2. Decorate the tags using : Pebbles, Brick and Bubbles dies.

3. Adhere the patterned tags to the white tags, and the brown tag to the transparent vinyl one.

4. Using a decorative piece from Tag and More 4-Flourish, die cut the hinges from black adhesive velvet to connect the tags.

5.Using black, white, beige, and yellow adhesive velvet die cut all the pieces for Whiskers the Cat and assemble as per photo.

6. From props 1,2,and 4 dies cut : the party hat, the glasses, and a couple of fish bones in green, black and yellow adhesive velvet.

7. Die cut two mice in yellow adhesive velvet, and two small triangles in green adhesive velvet to create the small party hats.

8. Die cut the sentiment ” Happy Birthday” from black adhesive velvet and patterned paper which has ECD Transparent Double Sided Adhesive Tape added to the back of it using the Alphabet die.

9. Tie ribbon to the top of each tag to decorate. Thanks for stopping by today! I hope you enjoyed my tutorial.

Supplies: 
Elizabeth Craft Designs:
Other Supplies:
Cardstock: Brown, and white.
Patterned Paper
Ribbon