Hello everyone, This month ECD Designer’s Challenge is inspired in the three wonderful background dies : The Pebbles, The Bricks and The Circles, It was a little difficult to pick my favorite so I decided to use them all.
Here is my Project:  1. Using the tag shape die from Tags & More 7 – Vine die cut:
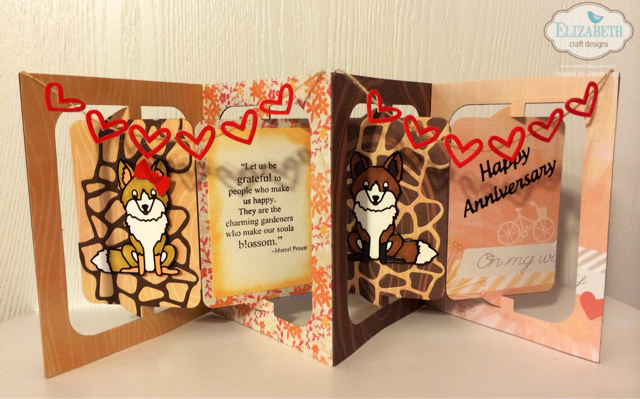
- Two 4 1/4” x 8” tags from patterned paper.(Adhere Transparent Double Sided Adhesive Tape to the back before die cutting)
- Two 4 1/4” x 8” tags from white cardstock.
- One 4 1/4” x 8” tag from brown cardstock.
- One from transparent vinyl.
2. Decorate the tags using : Pebbles, Brick and Bubbles dies.
3. Adhere the patterned tags to the white tags, and the brown tag to the transparent vinyl one.
4. Using a decorative piece from Tag and More 4-Flourish, die cut the hinges from black adhesive velvet to connect the tags.
5.Using black, white, beige, and yellow adhesive velvet die cut all the pieces for Whiskers the Cat and assemble as per photo.
6. From props 1,2,and 4 dies cut : the party hat, the glasses, and a couple of fish bones in green, black and yellow adhesive velvet.
7. Die cut two mice in yellow adhesive velvet, and two small triangles in green adhesive velvet to create the small party hats.
8. Die cut the sentiment ” Happy Birthday” from black adhesive velvet and patterned paper which has ECD Transparent Double Sided Adhesive Tape added to the back of it using the Alphabet die.
9. Tie ribbon to the top of each tag to decorate. Thanks for stopping by today! I hope you enjoyed my tutorial.
Supplies:
Elizabeth Craft Designs:
Other Supplies:
Cardstock: Brown, and white.
Patterned Paper
Ribbon
39.803360
-105.074827